The rumours are true – I’m a dabbler.
I really enjoy popping along to a one-off workshop, learning the very basics of a new skill and skipping away safe in the knowledge that I can do approximately 2% of everything I might want to do with my new tools and knowledge.
But in lockdown #3, I decided it was finally time to tackle something that had been looming over me for the best part of a year… my cross stitch kit.
I don’t have the most logical mind, and I’m certainly not handy. Show me a piece of flatpack IKEA furniture and I will show you that same piece of flatpack IKEA furniture in its box six months later. I’d got as far as opening the pack, looking at the threads and the Aida, peeking at the instructions and… nope, not a chance. Not a CHANCE!
That was around six months ago, and now…

Yes, it might not be the most beautiful or complex design, but I did this all on my own. I took the lettering from one website, the flower border from another (I’ll tell you about them below!) and I created the swirl myself (I’ll explain that too!). After a couple of practice runs, something just clicked in my mind. I know a lot of people feel the way I did before I taught myself to cross stitch, so I thought I’d share my tips for other beginners picking up this very hyggeligt activity!
1. Use your knees
This is a tip I learnt very early on! Every cross stitch pattern will call for a different number of threads from your skein, which usually comprises six individual threads twisted together. You will often need three threads, so half the skein, but I’ve also had to use two for finer details and four for chunkier sections, so don’t immediately discard the rest of the threads!
So, to misquote Tina Turner, what’s knees got to do, got to do with it? When you have cut your skein to the desired length and separated the first few centimetres of thread, hold each side of the separated threads in each hand, push your knees together and put the unseparated part between them. Hold your knees firmly together and pull gently upwards and outwards so that your threads unravel nicely without knotting. Much easier than trying to separate a skein in mid-air!
2. Start with a low Aida count
Aida is the fabric you’ll be using for your cross stitching. It’s essentially a grid, with holes of different sizes and distances apart depending on the Aida count. When you start out, you’ll want a nice low number – maybe an 8 or a 10. Be aware that it will look a bit gappy on the lower Aida counts, purely because your thread isn’t thick enough to completely fill the squares of the Aida grid, but that’s totally fine!
See what I mean about the gappiness? Anyway, as you progress and gain the muscle memory required, you’ll probably want to move up to a 12, 14 or even 16-count Aida – but be warned: the holes get teeny tiny very quickly! Six months in, I’m happy with 14 count, but you can get up into the 20s – good eyesight required!
3. Start with kits
If you’re anything like me, you’ll want to get cracking with your own original designs ASAP. But hold your horses! You need to learn the basics first. It took me a little bit of time to get the knack of the fine motor skills required, and the Hobbycraft cross stitch kits were a great place to start for me. They come with the Aida, skeins, a needle and the pattern, so you don’t need to buy everything individually.
Actually, I started with children’s kits! The Aida is bigger, so it’s easier to see what you’re doing, and some of them actually use wooden bases instead of fabric to make it easier still. Something like this fox pattern is ideal, or The Happy Cross Stitcher has some great beginners’ kits to help you get started.
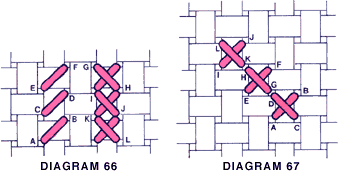
4. Don’t stitch upwards
It took me longer than I care to admit to figure out why the hell my stitches kept coming out whenever I stitched upwards. Nowhere in any of my beginner kits was this explained, so I’m going to tell you what I learned from a friend, who is a much more experienced and proficient cross stitcher than I will ever be!
Put simply, when you stitch vertically upwards, the final stitch of the previous cross and the first stitch of the next cross use the same hole in the Aida, so essentially you’re putting the stitch in and pulling it back out immediately. My friend taught me to complete all the first upward stitches at once, then complete all the downward stitches when I absolutely have to stitch upwards (diagram 66 here shows what I mean – just follow the alphabet). However, whenever I hit a section of my pattern that might require upward stitching, I tend to change direction and start stitching horizontally if possible, or leave the section entirely and stitch it all vertically downwards later.
5. Use free patterns
When you’ve ‘graduated’ from the kits, I highly recommend finding some free cross stitch patterns to continue experimenting. I took the bottom flower border from the main image from this pattern sheet, and I’m also eyeing up this beach hut pattern (but I’ll switch the Suffolk for Brighton, obviously).
If you’re looking for free cross stitch patterns, here are some sites to get you started:
6. Create your own messages
This is my little hidden gem! While you can find loads of lovely lettering patterns floating around online, this tool has been an absolute godsend for me. Stitchpoint’s cross stitch writer offers up a range of lettering styles, and more importantly, it allows you to tap in the message you want to stitch so you can see all the words in context.
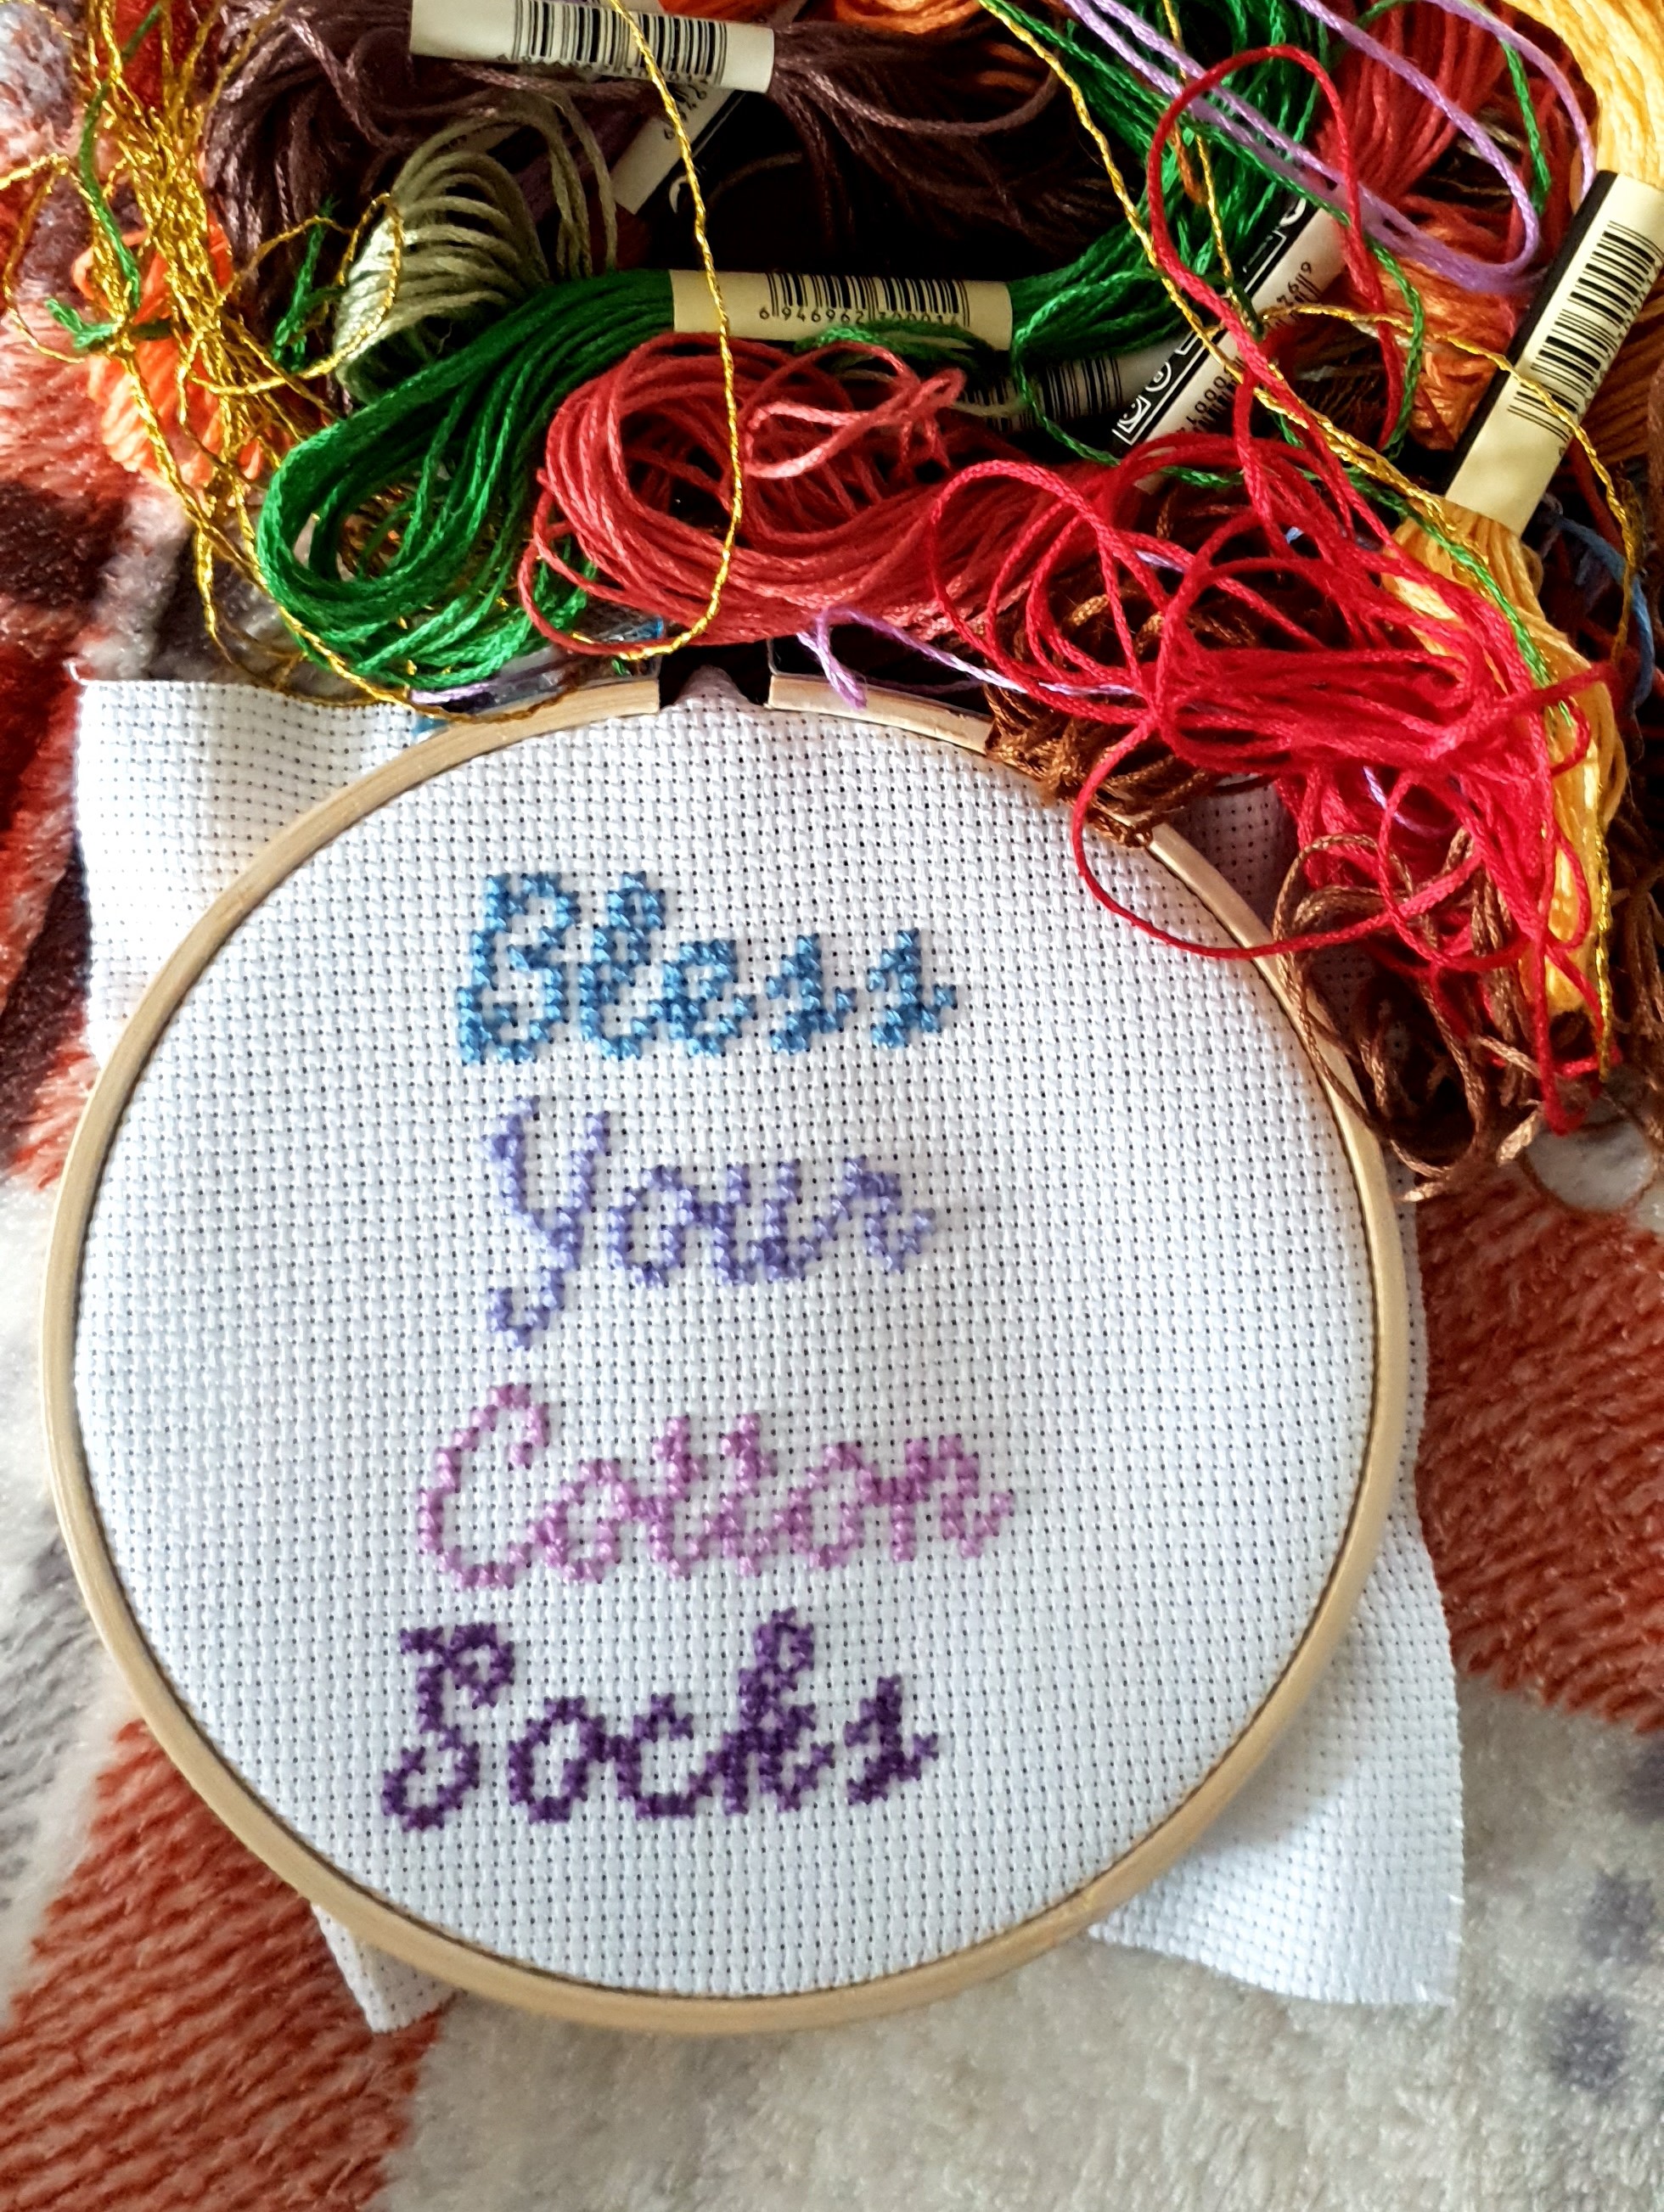
While I’ve found this extremely helpful for individual words, one thing to consider is that you’ll need to think carefully about the spacing when you’re stacking words vertically. As a beginner, it’s not easy to judge how the words will fit together, so you might end up with some awkward spacing like I got in my ‘Bless your cotton socks’ design (using the same Madrid lettering from the Stitchpoint tool as in my ‘Home Sweet Home’ design). I’m assuming this is something I’ll figure out over time, but if anyone has any tips for getting better at assembling cross stitch lettering, please send them my way!
7. Think about where you’ll display your finished piece
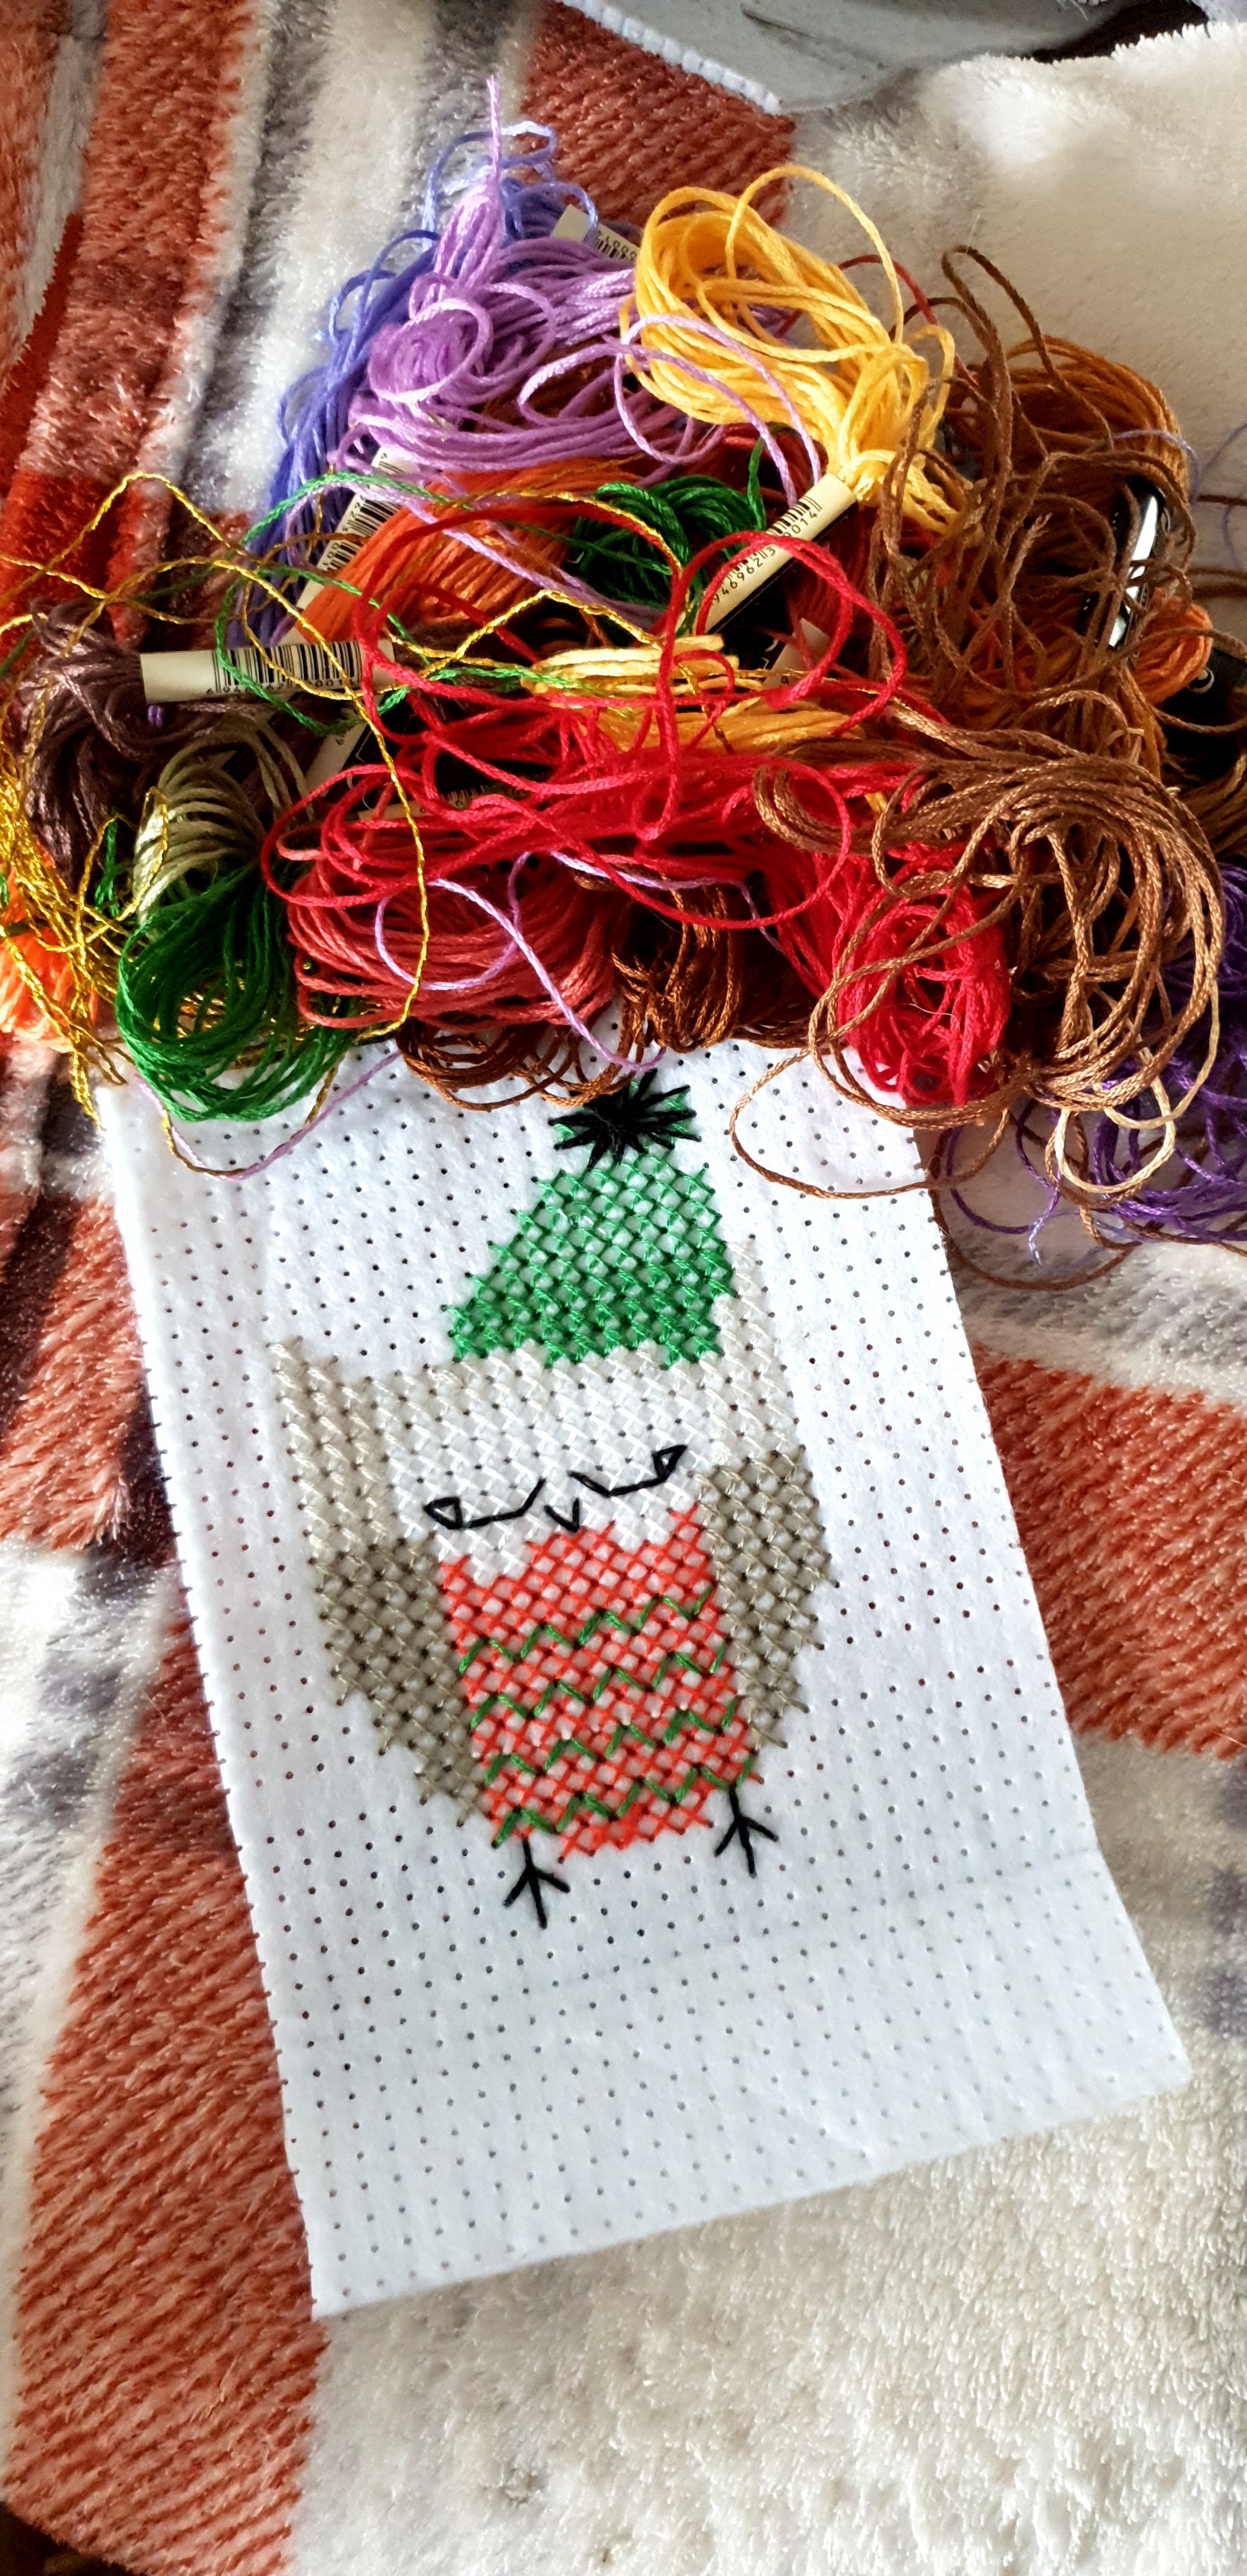
The free patterns you find are super handy, but you’ll notice that pretty much all of them come with a set of suggested skeins. I basically ignore the colour suggestions and pick my own – especially if I want to display them in a particular room or give them as a gift. For instance, I’m making an autumnal piece for my mum’s living room, which uses lots of burnt orange, brown and taupe, which is based on a purple floral pattern.
And speaking of displays, make sure you have some hoops and frames! You can get some super cheap and simple bamboo hoops or giant elaborate frames depending on what you’re looking for. I use cheap hoops to hold my Aida taut while I’m stitching, and then nicer frames for display purposes. I think at some point I’ll invest in a table stand to help alleviate the arm aches after hours of stitching, but I’m not quite there yet!
8. Don’t scrimp on your skeins
I cannot emphasise this enough: DON’T SCRIMP ON YOUR SKEINS. When I got the bug for cross stitch, I went on eBay and bought 100 skein colours for £4, and god you can really tell. The main problem is that they’re pretty rough, so they catch and tangle easily, and they don’t glide through the Aida like the higher-quality threads.
Learn from my mistakes and stick with a good brand like DMC. DMC’s cross stitch skeins are so smooth, and they look a whole lot better in the finished piece than my cheapo eBay threads. Instead of buying individual threads (unless you have a specific project in mind), I’d recommend buying a pack of cross stitch skeins so you can have fun playing around with the colours… though I must also recommend the DMC Light Effects skeins if you’re a little magpie for sparkles like me!
9. Use spreadsheets to design your own patterns
When I created my Home Sweet Home design, I didn’t like the gap between the words, so I decided to add a little swirl to fill the space and balance the design. I couldn’t find a swirl the right size or shape in any free designs, so I turned to Microsoft Excel to make my own!
Just set your cells to 0.5cm x 0.5cm (or whatever size square you want) by changing the width of the columns and the height of the rows, and you have yourself your very own cross stitch design planner. It’s super easy to plot where you want your stitches by changing the fill colour of the cells, and if you want to change things, you can just change the cell (or multiple cells) to ‘No fill’ and start again.

10. Get creative!
Since I got semi-decent at it, I can’t stop cross stitching. I have PDF upon PDF of patterns, and my craft box is bursting at the seams with sewing stuff. Even as a beginner, I’ve got so many ambitious ideas that I can’t wait to try out. For instance:
- Different Aida colours – you’ll probably stick with white or cream for your early designs, but once you’ve got a feel for what you like, take a look at all the fun Aida shades you can get! This grey would look amazing with silver and white thread, this navy would make a beautiful background for a starry zodiac design and this baby pink would be perfect for some giant monstera leaves! Or, just grab a bundle and have some fun!
- Dissolvable Aida – if you want to start customising clothing, towels or pillows with your cross stitch designs, you’ll need dissolvable Aida. You tack the Aida onto your fabric, stitch your design as normal (through both the Aida and the ‘proper’ fabric), then soak it in water and the water-soluble Aida just dissolves away. I can’t wait to upcycle some plain white shirts with some pretty cross-stitched collars!
- Add some sparkle – as much as separating my skeins into threads makes me swear profusely, it does have some benefits – especially if you’re a glitterbug! If you need three threads, you can take two threads of your base colour and mix in a single metallic thread – imagine a delicate shimmery green through a sea design, or a strand of bronze through some autumn leaves. Beautiful!
- Stitch your own photos – tools like Pic2Pat will take your photo and automatically generate a cross stitch pattern, including recommendations for the number and colour of skeins you’ll need. And it’s free! Alternatively, use a service like Photo-stitch to get not just your pattern, but a full kit complete with the relevant colours, ready for you to stitch as soon as it arrives.
Cross stitching for hygge
For me, hygge and cross stitch are completely intertwined. I can sit down for hours with a cup of tea (several cups of tea) and a slice of something delicious and work my way through a design. It’s really satisfying to design and create something from scratch, and I genuinely lose entire afternoons when I get stuck into a new pattern.
If anything, I wish I’d picked up cross stitch at the very start of lockdown #1! It’s such a soothing activity, and making something with my hands seems to soothe my anxiety. Burn a scented candle or get your oil diffuser on the go, open a window for some fresh air and play some relaxing music and you’re off and away.
And while cross stitching isn’t a specifically Scandinavian craft, the good news is that if you want to take inspiration from beautiful Scandi designs (and who doesn’t?), Scandinavian Cross Stitch Designs by Jana Hauschild Lindberg will provide lots of gorgeous ideas.
Ready to get stitching?
If you’re keen to stitch yourself something beautiful, I’d love to give you 20% off your first order with LoveCrafts! Just follow this link and you’ll snag yourself a sweet discount off Aida, skeins, kits, hoops and much more.
I can also highly recommend browsing Etsy for patterns – you can find pretty much anything on there, and I already have my eye on a whole bunch of beautiful autumnal designs ready for the season ahead.
Have you ever tried cross stitching? If not, what’s your craft of choice? Lastly, if you have any tips for a cross stitching novice, my sore fingertips and I would love to hear them!

Hi
In my 4th grade we learned x-sting, and how to knit.
Strikking of scarf and other unuseful things.
You really have a nice posting about Norwegian and Scandinavien issues.
So nice👍
Arnstein
Sendt fra min iPhone
8. aug. 2021 kl. 19:17 skrev Hello Hygge :
Kayleigh Tanner posted: ” The rumours are true – I’m a dabbler. I really enjoy popping along to a one-off workshop, learning the very basics of a new skill and skipping away safe in the knowledge that I can do approximately 2% of everything I might want to do with my new tools”
Wow, that’s so cool! I wish we’d learnt those things at school – we learnt basic backstitch, running stitch and how to use a sewing machine, but I would’ve much preferred to learn cross stitch and knitting. Thanks so much Arnstein!
“What’s Love Got to Do with It?” was sung by Tina Turner, not Whitney Houston. That said, congrats on your cross-stitch! I laughed out loud at your opening paragraph about dabbling enough to pick up skills to produce 2% of what you want to do, haha. Same here! My confession to you is that I have been carrying around a cross-stitch project similar to yours (mine’s roses) for DECADES. Through moves to MULTIPLE STATES!! I almost, ALMOST pitched it before my latest move last year, but then I thought, no. It’s a pandemic. A plague might be the motivation I need at last! Still haven’t touched it, but who knows, maybe your blog post will do it, haha! Keep on stitching, and enjoy!
P.S. I also dabbled in knitting. Twenty years ago. I have a scarf I need an expert knitter to cast off for me so I can finally wear it this year! 🙂
That’s so odd, I switched Ms Houston’s name for Ms Turner’s yesterday – wonder what’s going on there! I’m very impressed that you’ve held onto your project for decades though – I lose mine within days!
I could knit as a child, but I’ve totally lost the ability now as an adult. I feel like I should relearn though!